PWA 偽裝術:manifest.json
https://jonny-huang.github.io/angular/training/19_pwa/
什麼是 漸進式網頁應用程式(PWA) 其在網路上已經有很多篇文章了,筆者看完得到的結論就是-讓以前只有 APP 做得到的事情,現在在 Web 上也可以做到,而現在之所以能實現是因為新版的瀏覽器增加了相關功能,言下之意就是瀏覽器的版本很重要,後續測試會以 Google Chrome 為主。
我們可以看一下 W3C 最新的 Web App Manifest 草案,可以看到編輯者主要來自 Mozilla、Intel、Google、Microsotf,這意味著主流瀏覽器都將支援。
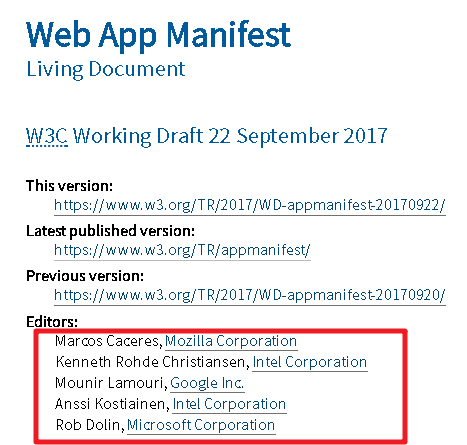
雖然 Apple 並沒有在名單內,不過 查看 WebKit Feature Status 可以看到 Web App Manifest 已經列入考慮選項內,這也表示如果沒有意外 Safari 未來也將支援。

這邊我們拿之前練習到 Angular 服務 的程式來當範例。
 first-app_2017-09-14.zip
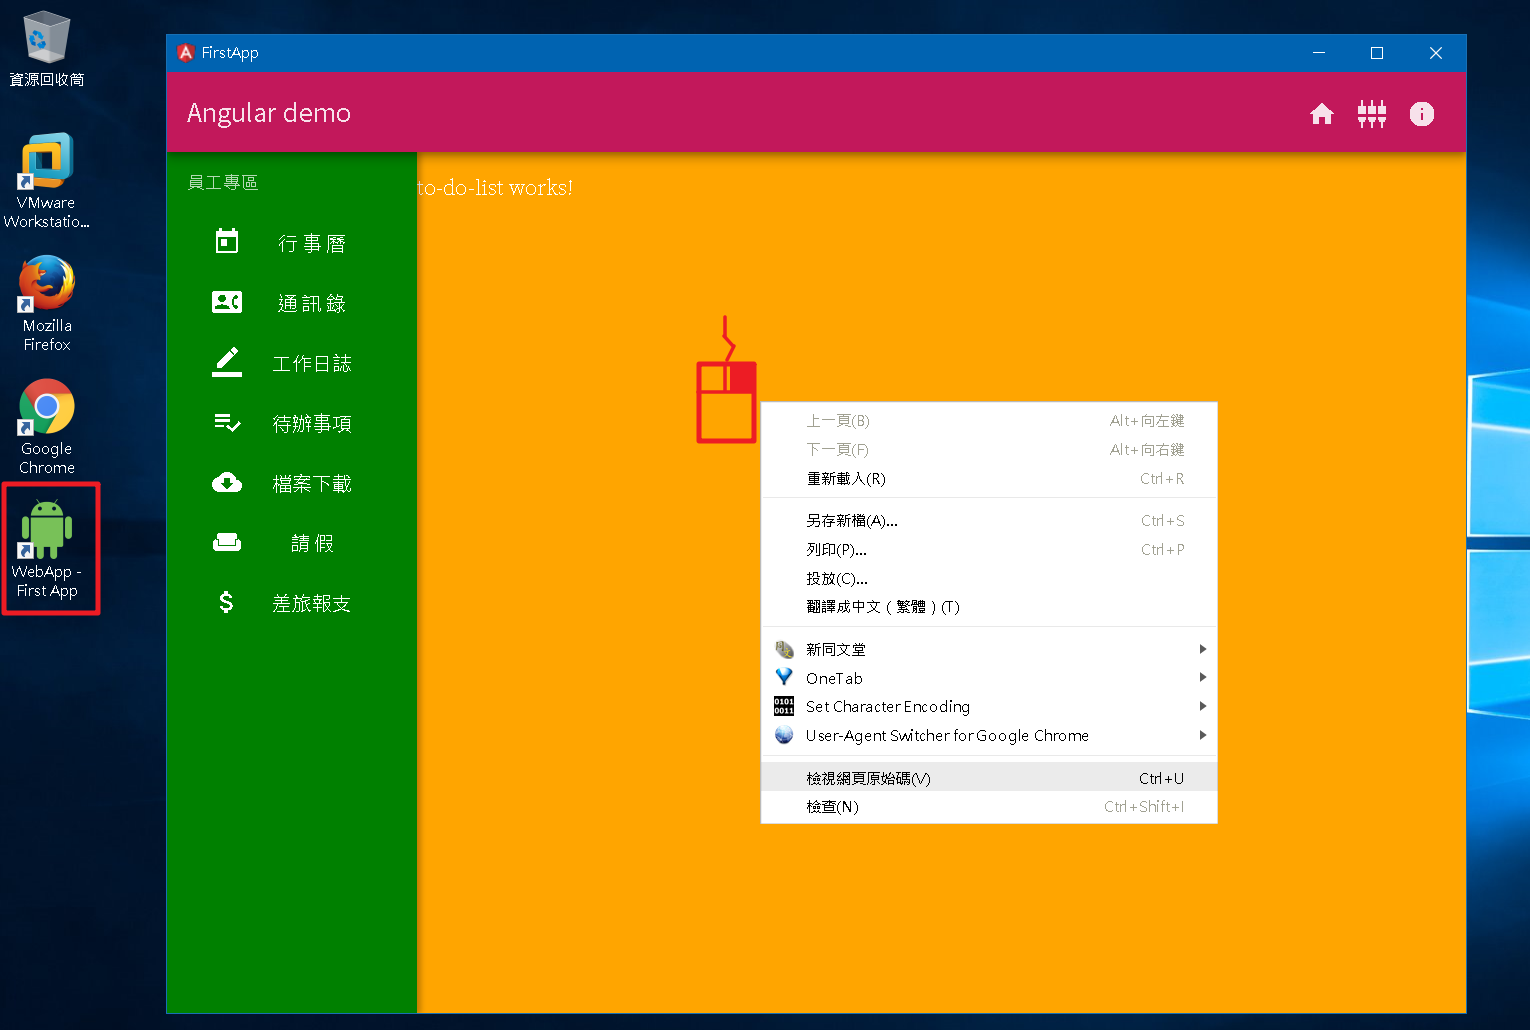
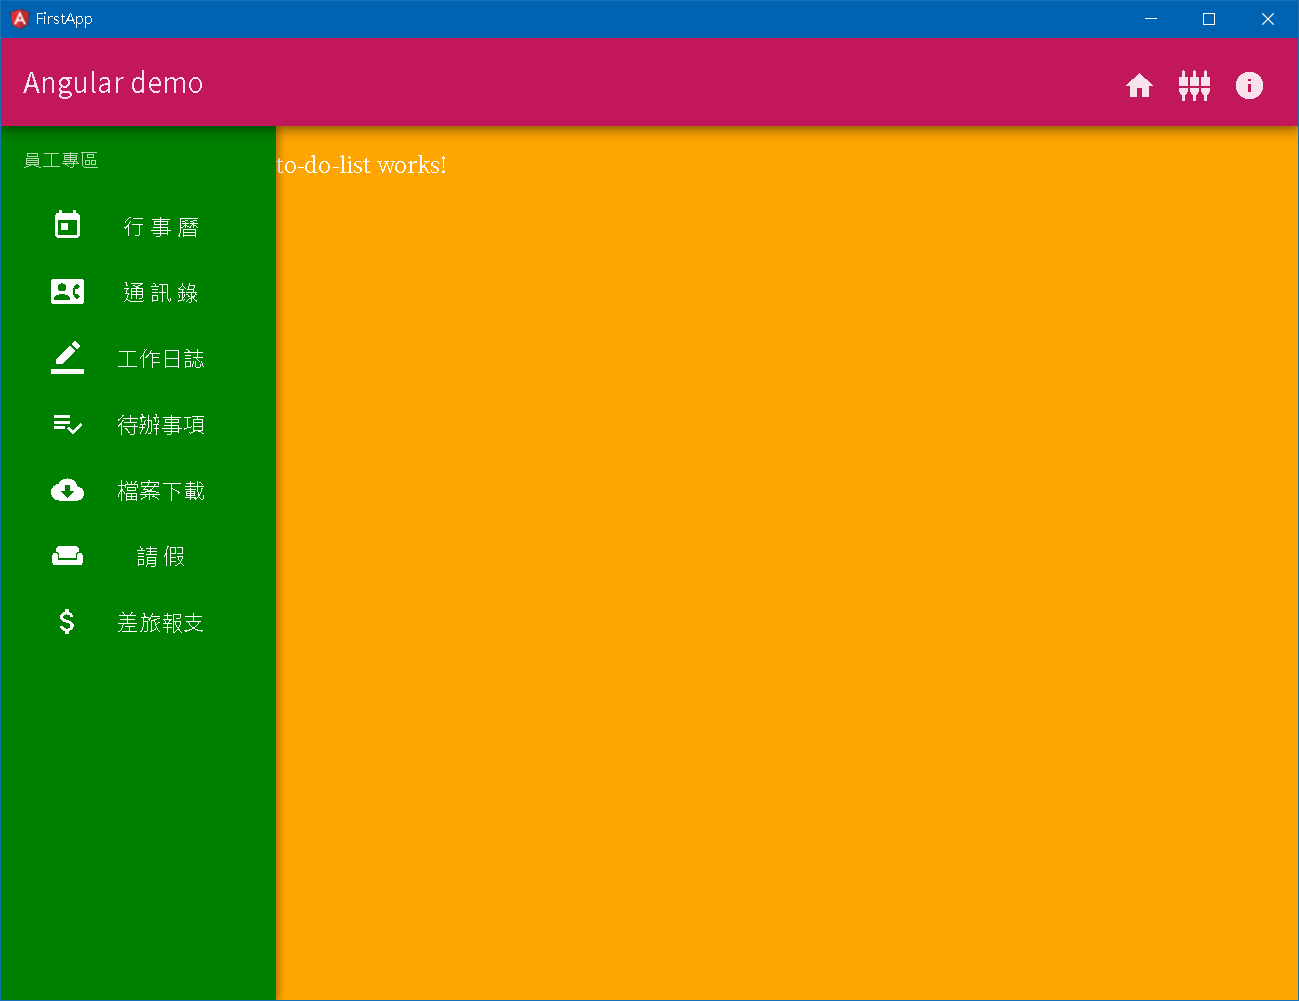
點選捷徑啟動應用程式,可以發現透過 Chrome 預設開啟時就我們隱藏網址列與工具列,若不是透過滑鼠右鍵的功能選單,還真的很難發現這是 Web App,跟我們在 Electron:跨平台的視窗應用程式 所做的步驟比起來是否更加簡單。
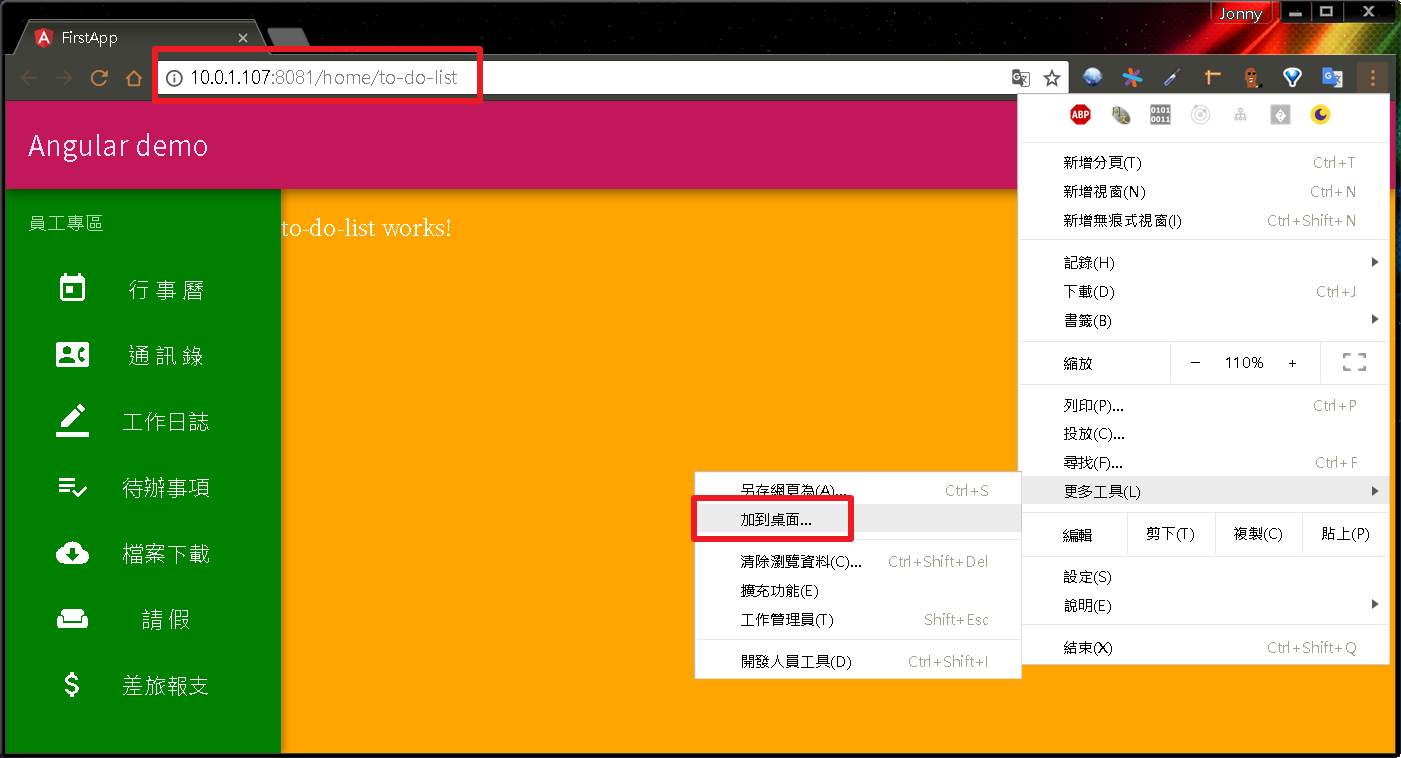
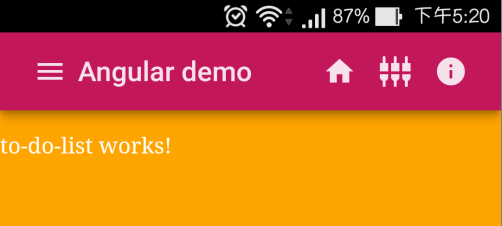
再將 Web 程式加到桌面,我們可以注意到因為 Angular 路由規則的關係預設會被導到待辦事項,所以網址會變成 http://10.0.1.107:8081/home/to-do-list。
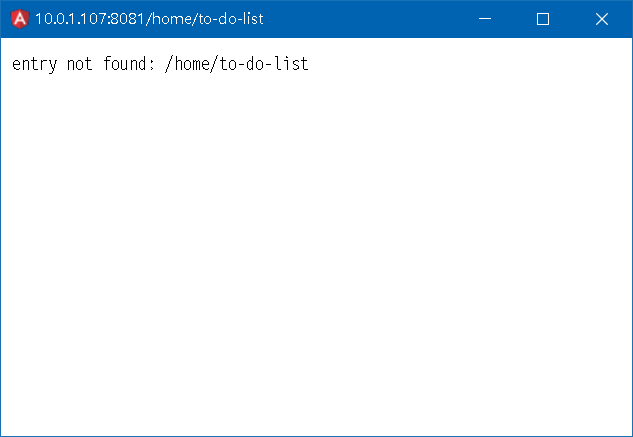
接著透過桌面捷徑啟動,可以發現找不到 /home/to-do-list 的錯誤訊息,這是因為 Angular 是一個 SPA 網頁應用程式,所以除了首頁(index.html)之外就沒有任何實體網頁,網址列上的網址都是 Angular 路由模組產生的路由路徑,實際上並不存在。
我們可以透過設定 manifest.json 的
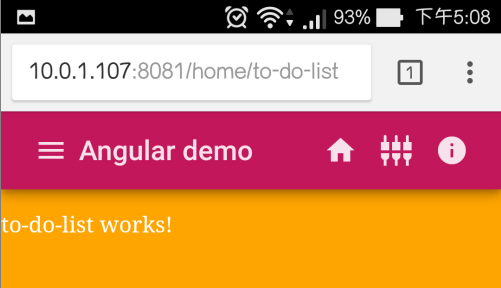
透過 Chrome 加到主畫面 功能,我們一樣可以將網站釘選到手機桌面,只是預設名稱會改用 應用程式簡稱(short_name),點選新增後就會在手機桌面建立捷徑。
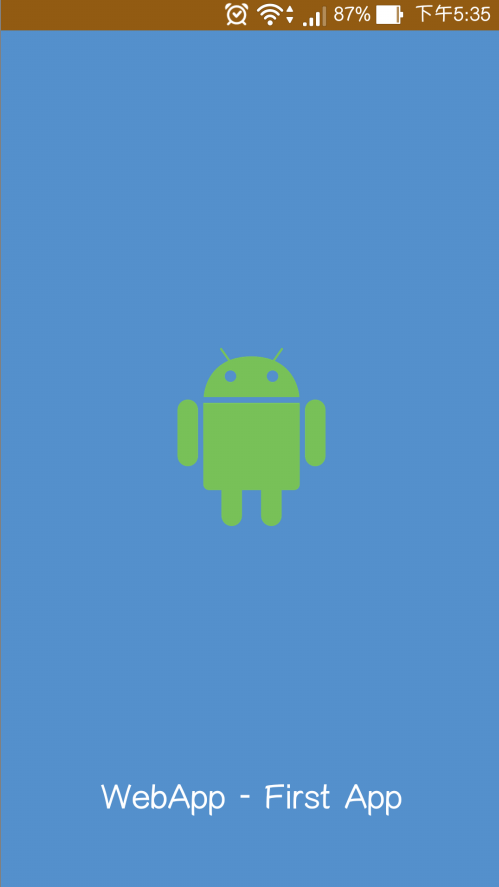
點選捷徑來啟動 Web App 可以發現在網頁載入的等待過程會有 啟動畫面(Splashscreen),開啟後可以發現一樣是沒有網址列的滿版網頁。
最後我們在
first-app_2017-09-25.zip
我們可以看一下 W3C 最新的 Web App Manifest 草案,可以看到編輯者主要來自 Mozilla、Intel、Google、Microsotf,這意味著主流瀏覽器都將支援。
雖然 Apple 並沒有在名單內,不過 查看 WebKit Feature Status 可以看到 Web App Manifest 已經列入考慮選項內,這也表示如果沒有意外 Safari 未來也將支援。
參考文件:你的首個 Progressive Web App
manifest.json
manifest.json 與 Service Work 可以說是 PWA 最核心的功能,比起較複雜的 Service Work,本篇先練習如何透過 manifest.json 就可以讓 Web APP 看起來跟一般的 APP 一樣。這邊我們拿之前練習到 Angular 服務 的程式來當範例。
若要下載請記得先透過指令 npm install 來重新安裝 package。
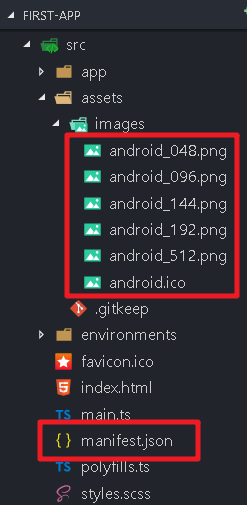
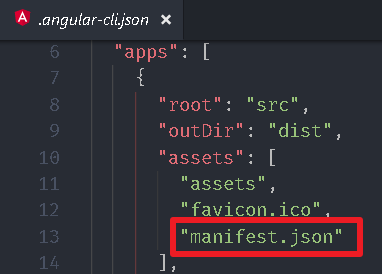
我們在專案目錄下的 src 資料夾內建立一個 manifest.json,並添加相關設定值,以及應用程式圖示,下面是比較常用的設定值: 若是 Angular 專案,別忘了將manifest.json加到.angular-cli.json的assets,這樣建置時才會將manifest.json一併複製。
| 欄位 | 說明 |
|---|---|
| name | 應用程式名稱 |
| short_name | 應用程式簡稱 |
| display | 顯示模式:fullscreen、standalone、minimal-ui、browser |
| start_url | 設定起始頁面 |
| description | 應用程式描述 |
| scope | 相關設定影響範圍 |
| background_color | 啟動畫面(Splashscreen)背景顏色 |
| theme_color | 主題顏色 |
| dir | 排版方式:ltr(由左到右)、rtl(由右到左)、auto |
| lang | 應用程式語系 |
| orientation | 螢幕方向:any、natural、landscape、portrait、portrait-primary、portrait-secondary、landscape-primary、landscape-secondary |
| icons | 應用程式圖示 |
其他設定可參考我們先添加應用程式名稱與圖示:
W3C - Web App Manifest
MDN - WebExtensions:manifest.json
{"name": "WebApp - First App","short_name": "FirstApp","description": "My First APP","icons": [{"src": "./assets/images/android_048.png","sizes": "48x48","type": "image/png"},{"src": "./assets/images/android_096.png","sizes": "96x96","type": "image/png"},{"src": "./assets/images/android_144.png","sizes": "144x144","type": "image/png"},{"src": "./assets/images/android_192.png","sizes": "192x192","type": "image/png"},{"src": "./assets/images/android_512.png","sizes": "512x512","type": "image/png"}]}
找不到圖示的,可以像筆者一樣去下載 Metro Studio,註冊帳號後就會收到一組免費序號,目前版本累積圖示有 7000 多個,可以自己調整圖示大小、顏色、旋轉、外框,也提供多種匯出格式,不過最重要的是可以用於商業用途。


link
接著就是將manifest.json 關連到網頁上,開啟 src\index.html,將下列語法加入 head tag 內。<link rel="manifest" href="manifest.json">
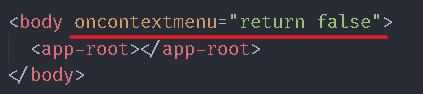
<!doctype html><html lang="en"><head><meta charset="utf-8"><title>FirstApp</title><base href="./"><meta name="viewport" content="width=device-width, initial-scale=1"><link rel="icon" type="image/x-icon" href="favicon.ico"><link href="https://fonts.googleapis.com/icon?family=Material+Icons" rel="stylesheet"><link rel="manifest" href="manifest.json"></head><body oncontextmenu="return false"><app-root></app-root></body></html>
Safari
目前針對 Safari 瀏覽器我們需要在網頁內的head tag 加入額外設定,尤其需要針對不同 iOS 裝置提供對應尺寸的圖示,當 Safari 正是支援 W3C 標準後應該就可以省略,修改設定如下:<meta name="apple-mobile-web-app-capable" content="yes">
...<head>...<link rel="manifest" href="manifest.json"><!-- Apple Safari --><meta name="apple-mobile-web-app-capable" content="yes"><meta name="apple-mobile-web-app-status-bar-style" content="black"><meta name="apple-mobile-web-app-title" content="WebApp - First App"><link rel="apple-touch-icon" href="./assets/images/android_057.png" sizes="57x57"><link rel="apple-touch-icon" href="./assets/images/android_060.png" sizes="60x60"><link rel="apple-touch-icon" href="./assets/images/android_072.png" sizes="72x72"><link rel="apple-touch-icon" href="./assets/images/android_076.png" sizes="76x76"><link rel="apple-touch-icon" href="./assets/images/android_114.png" sizes="114x114"><link rel="apple-touch-icon" href="./assets/images/android_120.png" sizes="120x120"><link rel="apple-touch-icon" href="./assets/images/android_144.png" sizes="144x144"><link rel="apple-touch-icon" href="./assets/images/android_152.png" sizes="152x152"><link rel="apple-touch-icon" href="./assets/images/android_167.png" sizes="167x167"><link rel="apple-touch-icon" href="./assets/images/android_180.png" sizes="180x180"></head>...
參考文件:Configuring Web Applications
Windows:加到桌面
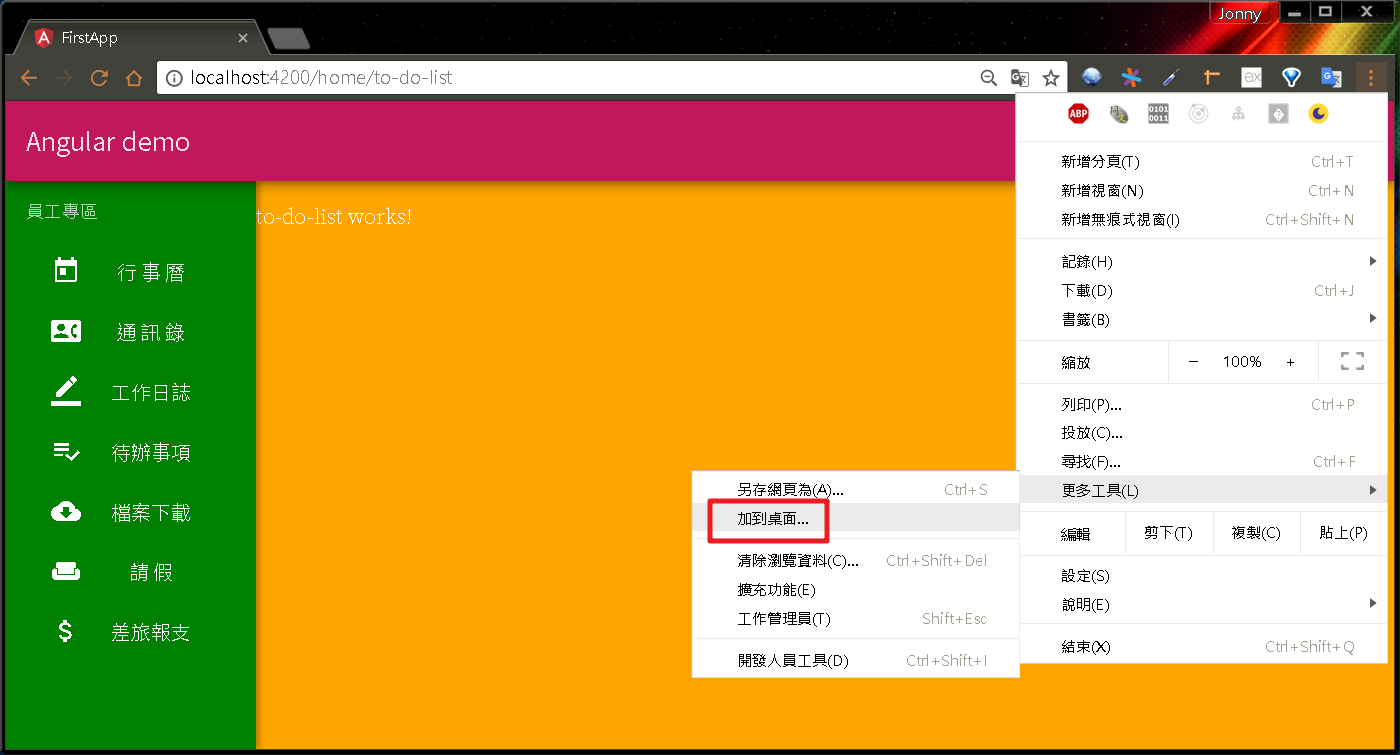
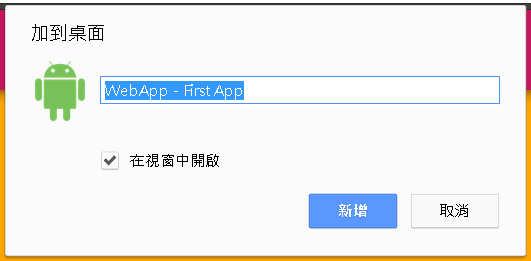
執行指令ng serve 來啟動 Angular 專案,點選 Chrome 瀏覽器 加到桌面 功能,從出現的對話視窗可以看到,圖示跟應用程式名稱都是來自 manifest.json,確認後可以發現桌面多一個類似應用程式的捷徑。點選捷徑啟動應用程式,可以發現透過 Chrome 預設開啟時就我們隱藏網址列與工具列,若不是透過滑鼠右鍵的功能選單,還真的很難發現這是 Web App,跟我們在 Electron:跨平台的視窗應用程式 所做的步驟比起來是否更加簡單。
如果確定網站不會使用到滑鼠右鍵,那可以更進一步把右鍵隱藏,讓一般使用者幾乎無法察覺。
start_url
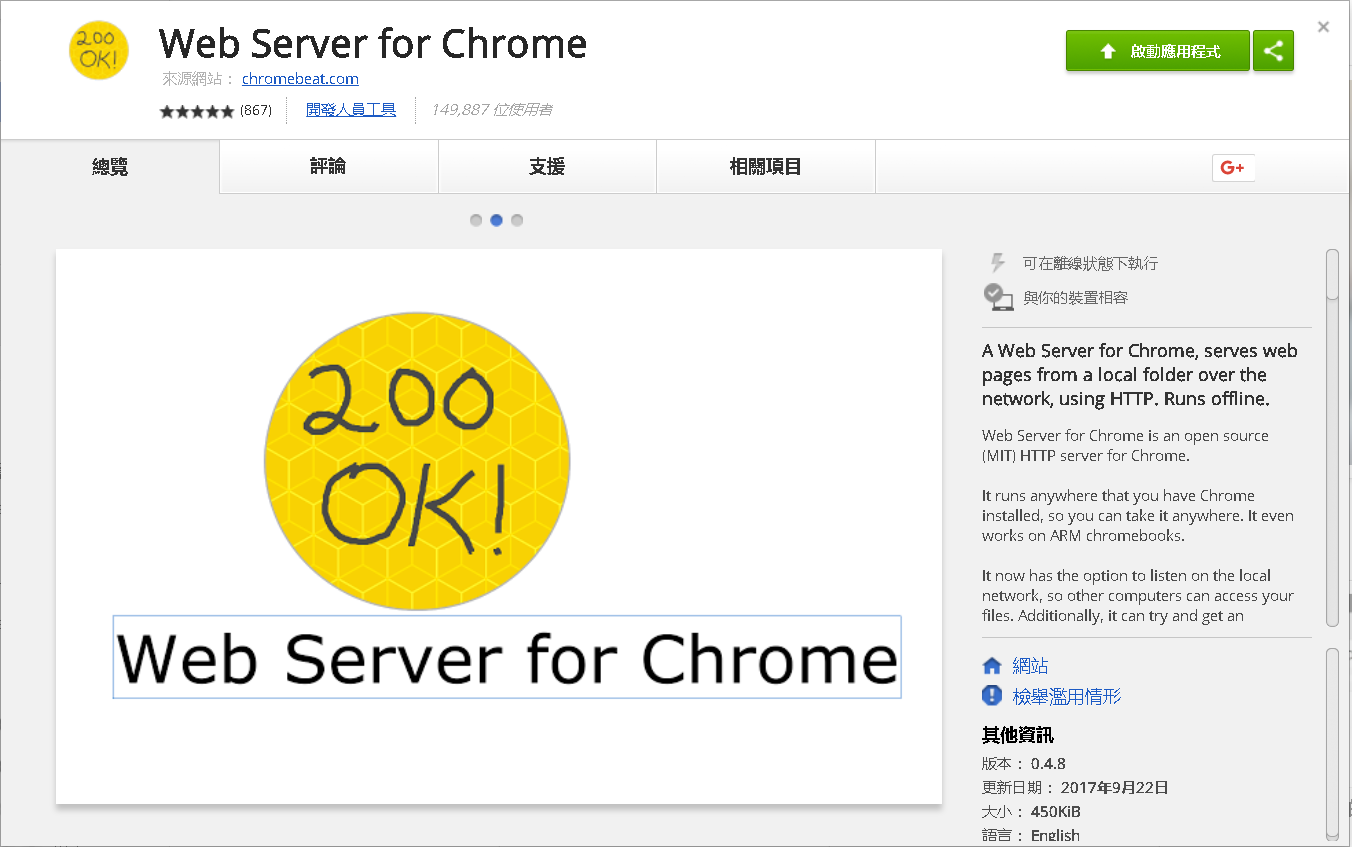
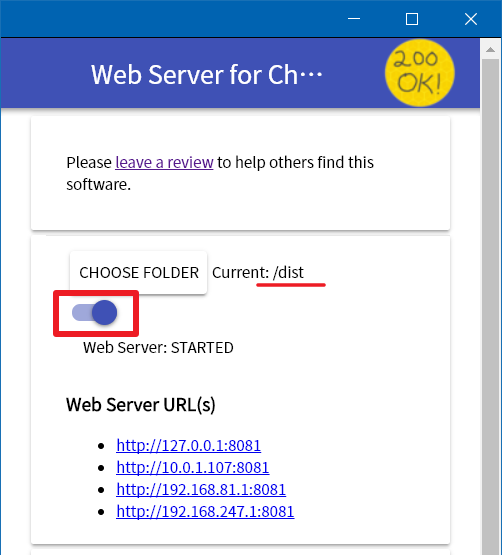
接下來我們安裝 Chrome 擴充功能-Web Server for Chrome,透過它可以快速建立一個網頁伺服器,我們只要將資料夾設定為 Angular 輸出資料夾dist,接著啟動 Web Server 就可以開始使用,在這邊筆者特別將連接埠改為 8081,透過瀏覽器檢視 http://10.0.1.107:8081。再將 Web 程式加到桌面,我們可以注意到因為 Angular 路由規則的關係預設會被導到待辦事項,所以網址會變成 http://10.0.1.107:8081/home/to-do-list。
接著透過桌面捷徑啟動,可以發現找不到 /home/to-do-list 的錯誤訊息,這是因為 Angular 是一個 SPA 網頁應用程式,所以除了首頁(index.html)之外就沒有任何實體網頁,網址列上的網址都是 Angular 路由模組產生的路由路徑,實際上並不存在。
我們可以透過設定 manifest.json 的
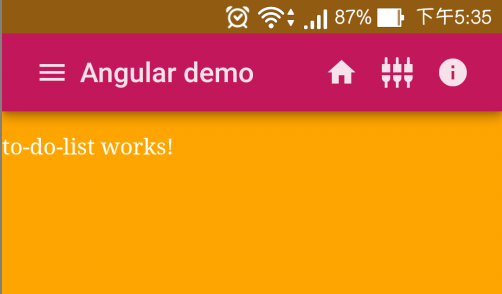
start_url 來解決這個問題,將 start_url 設定為首頁-index.html,透過添加此屬性,可以強制改由 start_url 所指定的網址來開啟。 重新建立潔淨後再執行應該就能正常顯示了。
{"name": "WebApp - First App","short_name": "FirstApp","start_url": "./index.html","description": "My First APP","icons": [...]}
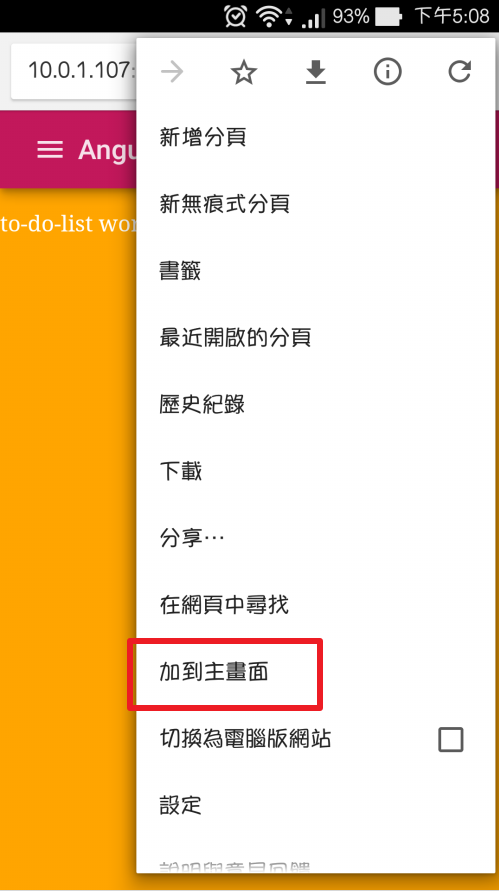
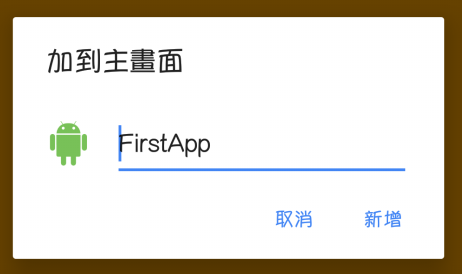
Android:加到主畫面
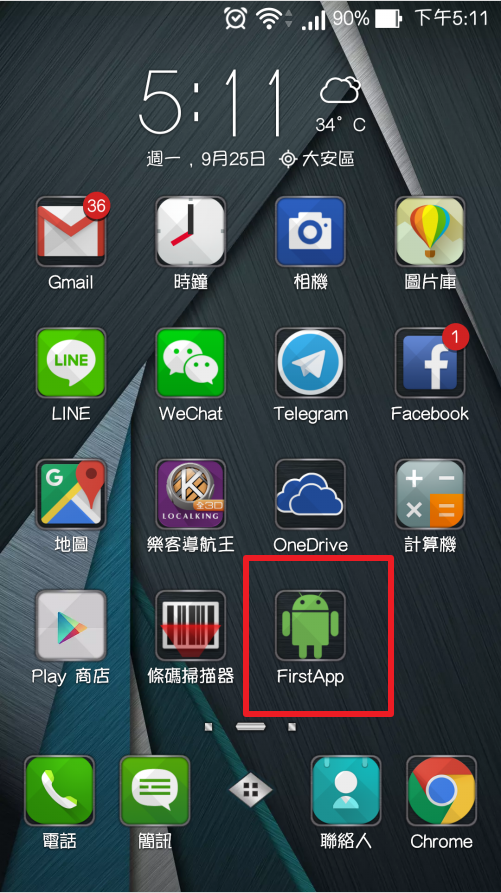
接著我們改用 Android 手機的 Chrome 瀏覽器連結網站 http://10.0.1.107:8081。透過 Chrome 加到主畫面 功能,我們一樣可以將網站釘選到手機桌面,只是預設名稱會改用 應用程式簡稱(short_name),點選新增後就會在手機桌面建立捷徑。
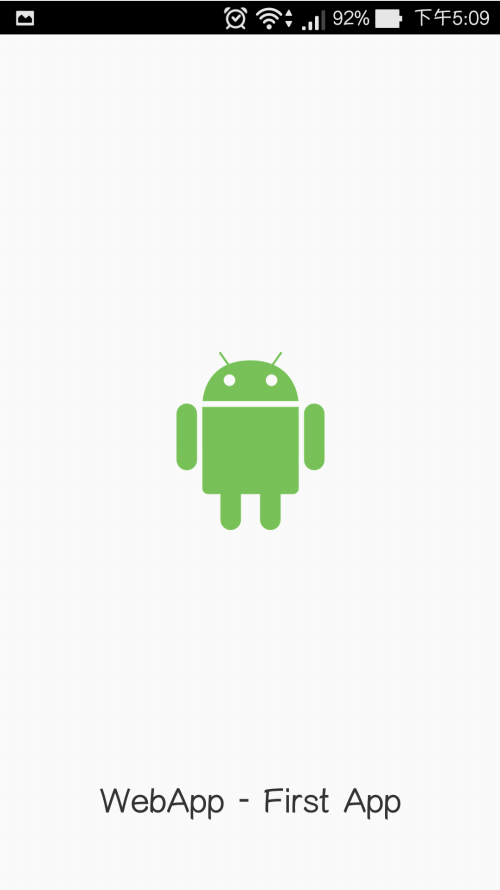
點選捷徑來啟動 Web App 可以發現在網頁載入的等待過程會有 啟動畫面(Splashscreen),開啟後可以發現一樣是沒有網址列的滿版網頁。
最後我們在
manifest.json 內在透過 background_color 來設定啟動畫面的背景顏色,透過 theme_color 來設定手機的主題顏色,修改如下: 重新建立捷徑後再啟動,可以看到啟動畫面的背景顏色與手機上方的狀態列顏色都改變了。
{"name": "WebApp - First App","short_name": "FirstApp","start_url": "./index.html","background_color": "#5490CC","theme_color": "#F4981F","description": "My First APP","icons": [...]}
沒有留言:
張貼留言