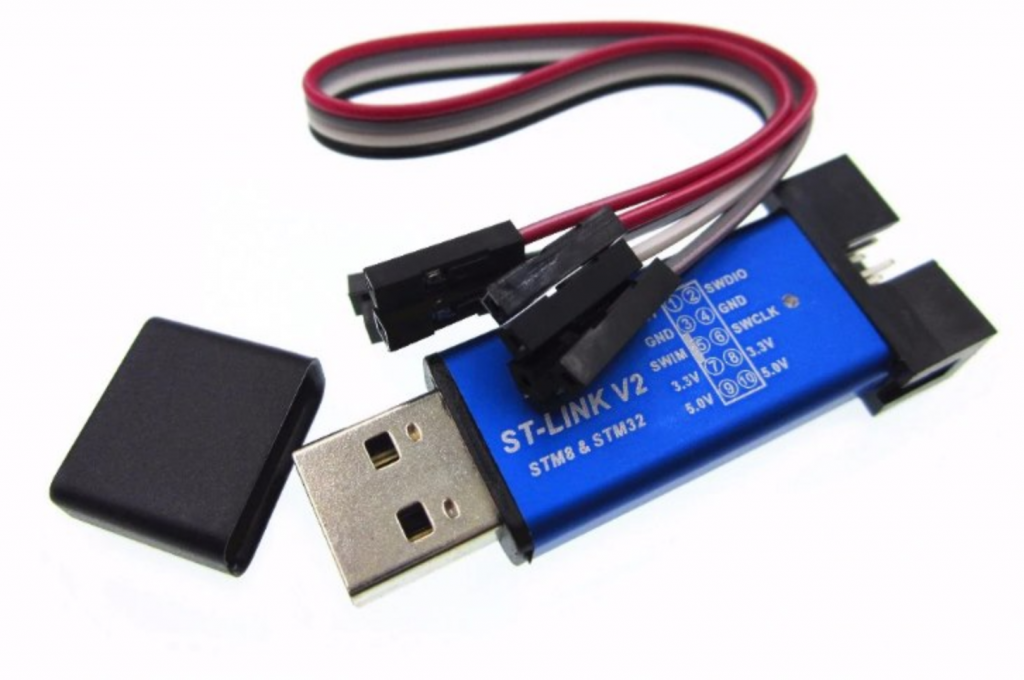
This guide is targeting Linux users and ST-Link v2 hardware.
First, we are going to install the necessary libraries and build tools:
sudo apt-get install git make cmake libusb-1.0-0-dev
sudo apt-get install gcc build-essential
Now, we will download and build the ST-Link utilities:
cd ~myusername
mkdir stm32
cd stm32
git clone https://github.com/stlink-org/stlink
cd stlink
cmake .
make
Now we copy the built binaries to their place:
cd bin
sudo cp st-* /usr/local/bin
cd ../lib
sudo cp *.so* /lib32
then udev rules:
sudo cp stlink/config/udev/rules.d/49-stlinkv* /etc/udev/rules.d/
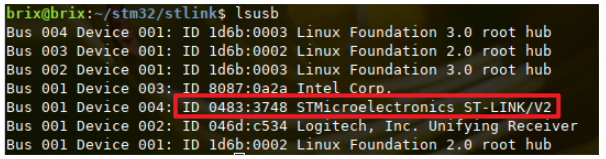
Now, plug the ST-Link device into the USB port, but DON’T CONNECT the target board, then type:
lsusb
If everything went OK, you should see something like this:
then:

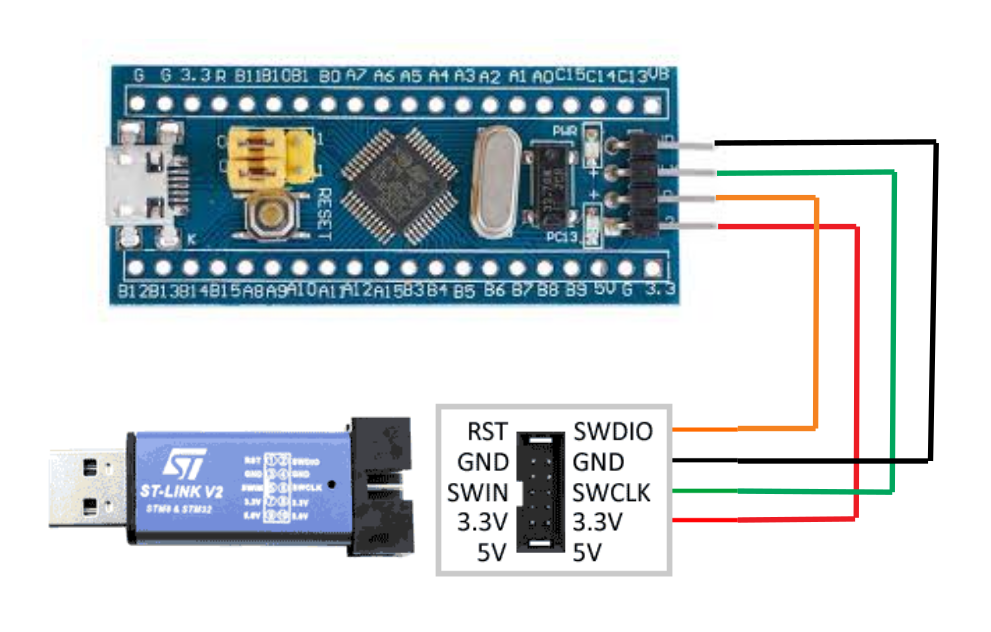
Now, disconnect the ST-LINK from USB, connect the four wires to the target board as in the picture
then plug back the ST-Link to the USB and type:
st-flash read dummy.bin 0 0xFFFF
You should see something like:

If the target board is not connected, the ST-Link device will be identified, but you (obviously) will get an error during memory read.
We can decide it is correctly installed.
Please add comments if you encounter any issue using this guide. I hope it will help you.
Thanks for the effort to all contributors to this repository https://github.com/stlink-org/stlink .
Check these articles related to STM32.
資料來源:https://freeelectron.ro/installing-st-link-v2-to-flash-stm32-targets-on-linux/
沒有留言:
張貼留言