介紹
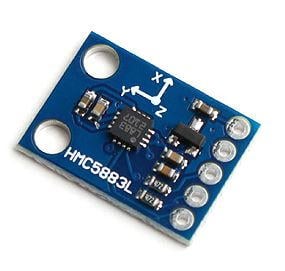
磁力計 HMC5883L 模塊
HMC5883L 是一款三軸磁力計,用於測量地球磁場的方向和大小。它用於低成本羅盤和磁力測量。
它沿 X、Y 和 Z 軸測量從毫高斯到 8 高斯的地球磁場值。
它可用於查找設備航向的方向。
它使用 I2C 協議與微控制器通信。
有關磁力計 HMC5883L 及其使用方法的更多信息,請參閱傳感器和模塊部分中的主題HMC5883L 磁力計模塊。
NodeMCU 可以使用 I2C 通信協議與該模塊進行通信。要了解有關 NodeMCU 中 I2C 功能的更多信息,請參閱 NodeMCU I2C with ESPlorer IDE或NodeMCU I2C with Arduino IDE
接口圖
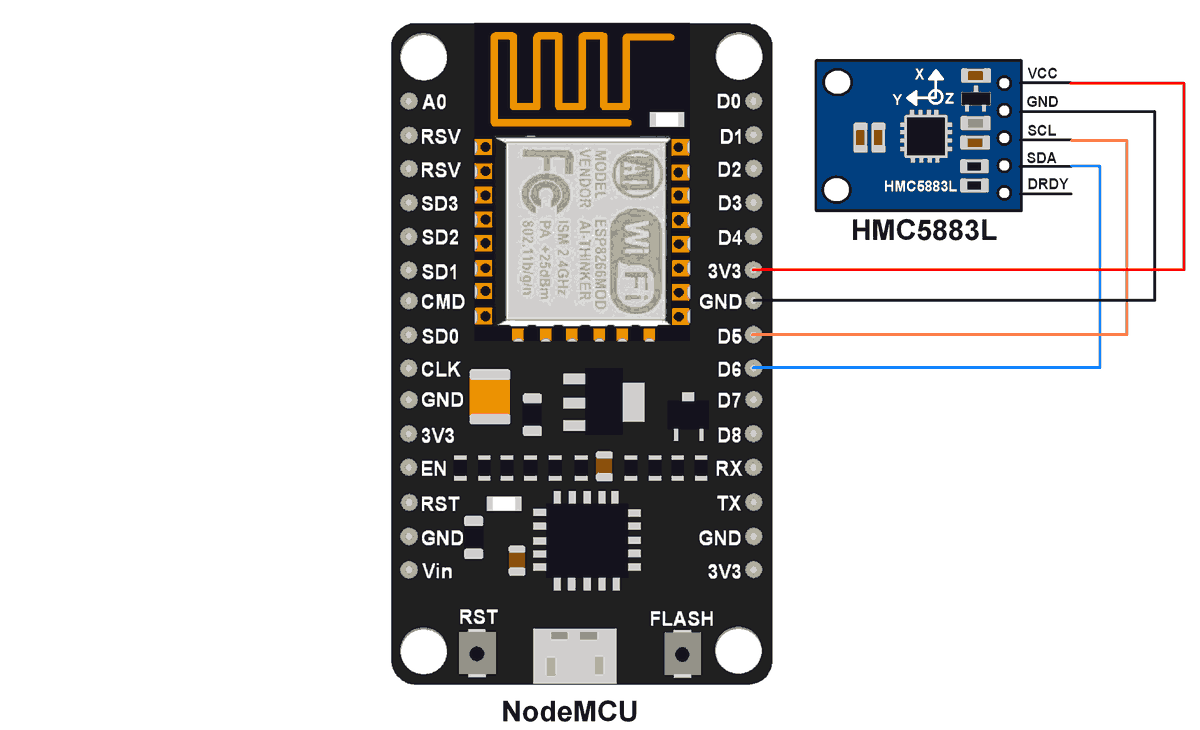
將 HMC5883L 模塊與 NodeMCU 連接
例子
從 HMC5883L 磁力計模塊讀取 x、y、z 軸,計算這三個軸的航向角,並在串行監視器上顯示航向角。
首先,按照上面的接口圖進行連接。
現在讓我們編寫 NodeMCU 程序來讀取 HMC5883L 磁力計的值。
我們可以用 Lua 腳本或 C/C++ 語言為 NodeMCU DevKit 編寫代碼。我們使用 ESPlorer IDE 用 Lua 腳本編寫代碼,使用 Arduino IDE 用 C/C++ 編寫代碼。要了解更多信息,請參閱 使用 ESPlorer IDE 開始使用 NodeMCU(對 NodeMCU 使用 Lua 腳本)和使用 Arduino IDE 開始使用 NodeMCU(對 NodeMCU 使用基於 C/C++ 語言的 Arduino 草圖)。
HMC5883L 的 NodeMCU 功能
以下是 NodeMCU 固件中用於 HMC5883L 模塊的函數。我們需要在構建 NodeMCU 固件時添加該模塊,以利用其功能。
hmc5883l.init()
該函數初始化 HMC5883L 模塊並設置引腳配置。
注意:根據 NodeMCU 文檔所說,“hmc5883l.init() 該功能已棄用,將在即將發布的版本中刪除。改為使用hmc5883l.setup()”。但是,雖然測試hmc5883l.init()有效,但hmc5883l.setup()沒有。所以要確定要初始化哪個函數。
句法: hmc5883l.init(sda, scl)
參數:
sda: i2c接口的串行數據引腳。
scl: i2c接口的串行時鐘引腳。
回報:無
hmc5883l.setup()
該函數初始化模塊。
句法: hmc5883l.setup()
參數:無
返回:無
例子:
local sda, scl = 1, 2
i2c.setup(0, sda, scl, i2c.SLOW) -- call i2c.setup() only once
hmc5883l.setup()
hmc5883l.read()
此函數對傳感器進行採樣並返回 X、Y 和 Z 軸數據。
句法: hmc5883l.read()
返回: x,y,z 測量值(整數)溫度乘以 10(整數)
例子:
local sda, scl = 1, 2
hmc5883l.init(sda, scl)
local x, z ,y = hmc5883l.read()
print(string.format("x = %d, y = %d, z = %d", x, y, z))
讓我們編寫 Lua 腳本從 HMC5883l 讀取 x、y、z 並從中計算航向角
NodeMCU 的 Lua 腳本
id  = 0 -- always 0
scl = 5 -- set pin 6 as scl
sda = 6 -- set pin 7 as sda


--Define declination of location from where measurement going to be done.
--e.g. here we have added declination from location Pune city, India.
--we can get it from http://www.magnetic-declination.com
pi = 3.14159265358979323846
Declination = -0.00669


function arcsin(value)
    local val = value
    local sum = value
    if(value == nil) then
        return 0
    end
-- as per equation it needs infinite iterations to reach upto 100% accuracy
-- but due to technical limitations we are using
-- only 10000 iterations to acquire reliable accuracy
    for i = 1, 10000, 2 do
        val = (val*(value*value)*(i*i)) / ((i+1)*(i+2))
        sum = sum + val;
    end
    return sum
end

function arctan(value)
    if(value == nil) then
        return 0
    end
    local _value = value/math.sqrt((value*value)+1)
    return arcsin(_value)
end

function atan2(y, x)
    if(x == nil or y == nil) then
        return 0
    end

    if(x > 0) then
        return arctan(y/x)
    end
    if(x < 0 and 0 <= y) then
        return arctan(y/x) + pi
    end
    if(x < 0 and y < 0) then
        return arctan(y/x) - pi
    end
    if(x == 0 and y > 0) then
        return pi/2
    end
    if(x == 0 and y < 0) then
        return -pi/2
    end
    if(x == 0 and y == 0) then
        return 0
    end
    return 0
end

hmc5883l.init(sda, scl)       --initialize hmc5883l
while true do   --read and print accelero, gyro and temperature value
    local x,z,y = hmc5883l.read()
    Heading = atan2(y, x) + Declination

    if (Heading>2*pi) then    --Due to declination check for >360 degree
        Heading = Heading - 2*pi
    end
    if (Heading<0) then       --Check for sign
        Heading = Heading + 2*pi
    end

    Heading = Heading*180/pi  --convert radian to angle
    print(string.format("Heading angle : %d", Heading))
    tmr.delay(10000)   -- 10ms timer delay
end
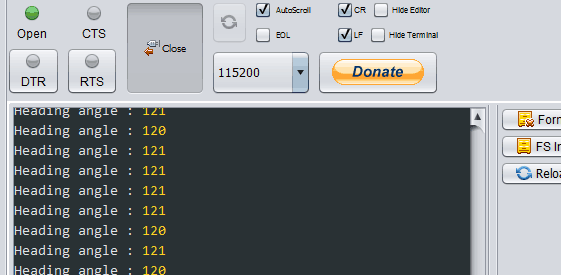
ESPlorer 串行輸出窗口
上述 Lua 腳本的 ESPlorer IDE 串口窗口的輸出窗口如下圖所示
現在讓我們在 Arduino ide 中為 NodeMCU 編寫相同的示例
用於 NodeMCU 的 Arduino 草圖
#include <Wire.h>
/* Define declination of location from where measurement going to be done.
e.g. here we have added declination from location Pune city, India.
we can get it from http://www.magnetic-declination.com */
#define Declination -0.00669
#define hmc5883l_address 0x1E
void setup() {
Serial.begin(9600); /* begin serial for debug */
Wire.begin(D6, D5); /* join i2c bus with SDA=D6 and SCL=D5 of NodeMCU */
hmc5883l_init();
}
void loop() {
Serial.print("Heading Angle : ");
Serial.println(hmc5883l_GetHeading());
delay(150);
}
void hmc5883l_init(){ /* Magneto initialize function */
Wire.beginTransmission(hmc5883l_address);
Wire.write(0x00);
Wire.write(0x70); //8 samples per measurement, 15Hz data output rate, Normal measurement
Wire.write(0xA0); //
Wire.write(0x00); //Continuous measurement mode
Wire.endTransmission();
delay(500);
}
int hmc5883l_GetHeading(){
int16_t x, y, z;
double Heading;
Wire.beginTransmission(hmc5883l_address);
Wire.write(0x03);
Wire.endTransmission();
/* Read 16 bit x,y,z value (2's complement form) */
Wire.requestFrom(hmc5883l_address, 6);
x = (((int16_t)Wire.read()<<8) | (int16_t)Wire.read());
z = (((int16_t)Wire.read()<<8) | (int16_t)Wire.read());
y = (((int16_t)Wire.read()<<8) | (int16_t)Wire.read());
Heading = atan2((double)y, (double)x) + Declination;
if (Heading>2*PI) /* Due to declination check for >360 degree */
Heading = Heading - 2*PI;
if (Heading<0) /* Check for sign */
Heading = Heading + 2*PI;
return (Heading* 180 / PI);/* Convert into angle and return */
}
/* Uncomment below function for reading status register */
//uint8_t readStatus(){
// Wire.beginTransmission(hmc5883l_address);
// Wire.write(0x09);
// Wire.endTransmission();
// Wire.requestFrom(hmc5883l_address, 1);
// return (uint8_t) Wire.read();
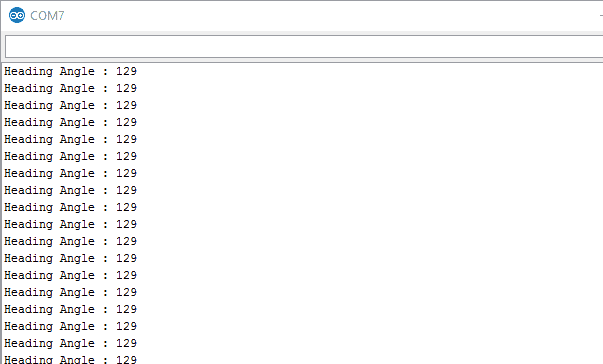
//}Arduino 串行輸出窗口
上述 Arduino 草圖的 Arduino IDE 串行窗口的輸出窗口如下所示
請注意,航向也會受到設備傾斜和附近磁性設備影響的影響。附件中提供了補償方法。
資料來源:https://www.electronicwings.com/nodemcu/magnetometer-hmc5883l-interfacing-with-nodemcu
沒有留言:
張貼留言